Picking up leaves in our garden can be a pain, but what if you could use it to benefit your veggies? Find out how to make leaf mulch in plastic bags and get free nutrients for your plants.
One job many gardeners dislike is picking up leaves in autumn. Depending on how big your garden is, it can be a lot of work.
Clearing up leaves doesn’t just make your garden look tidier; there are other reasons to do it. A layer of leaves on your lawn over winter can kill the grass, because it blocks out the light.
It will do the same for plants in beds that need light to get through winter.
Wet leaves are also a slip hazard on pavements and patios, so clearing them is also a question of health and safety.
And while it can be a lot of work, the leaves can be turned into leaf mulch and used on your vegetable beds. Adding leaf mulch to your vegetable beds can improve the soil microbial properties, which means the soil will be healthier. (Jourgholami et al., 2020)
So, in this article you will find out how to make leaf mulch in plastic bags.
What You Need
The good news is that you don’t need much to make your own leaf mulch, only a few items you probably already have.
- A rake
- A lawn mower (optional)
- Some plastic bags
- A sharp object, such as a pair of scissors or a screwdriver
- Water
- Leaves
As you can see, making your own leaf mulch doesn’t involve much, similar to making your own homemade liquid fertiliser. Although making leaf mulch involves a bit more work.
The lawn mower is optional, but using it can help speed up the process of turning annoying leaves into nutrient-rich leaf mulch.
How To Make Leaf Mulch In Plastic Bags In 5 Easy Steps

Now that you know what you need, let’s get straight into it and find out how to make leaf mulch in plastic bags.
By the way, if you have trees in and around your garden that lose their leaves at different times, you might have to do this more than once.
But don’t worry, it’s not difficult and won’t take long, once you have piled up all the leaves.
Step 1: Rake Up The Leaves
We start with the bit that is most work: raking up all the leaves. Sounds simple? Well, it is.
You want to make sure you get all the leaves on your grass, beds and paths and patio, as these are the areas where they can cause issues.
We tend to leave a small leaf pile in the corner of our garden, where it is relatively safe from the wind. This will give many insects, such as beetles, somewhere to overwinter.
As a thank you, they will eat pests off your vegetable plants in summer, such as aphids.
Step 2: Shred The Leaves With A Lawn Mower (Optional)

The next step in our guide about how to make leaf mulch in plastic bags is optional, but I would recommend doing it. Because it will speed up the process.
Lay your leaves out in a line about the width of your lawnmower. Then go over it to shred the leaves.
The smaller the leaf pieces, the quicker they will decompose and the sooner you can use your homemade leaf mulch.
To prevent the leaves from clogging up your lawn mower, you might want to wait for a dry day to start making your own leaf mulch.
Step 3: Give Them A Good Soak
If you have skipped step two and your leaves are already wet, you can ignore this step. Otherwise, get your hose or watering can out and soak the leaves.
This will help them to decompose quicker, which means you will be able to use your homemade leaf mulch in the coming spring.
Leaves decompose with the help of fungi, and they need moisture to do their work. While dry leaves will eventually decompose, it will take a long time, and let’s face it, you want to use this precious resource sooner rather than later.
Step 4: Bag The Leaves Up

When the leaves are wet, put them in plastic bags. Bin bags work great.
Some people say to use black bags, but we have used both black and white bags and didn’t see a difference.
Black bags might have a slight advantage in that they will absorb the sun better, which means the leaves inside get warmer.
Warm, damp conditions are best for the fungi that turn leaves into leaf mulch. But any plastic bag will do, so don’t worry too much about the colour.
Once you have filled up your bags, close them securely. You don’t want the leaves to blow away in windy weather.
Step 5: Punch Holes In the Bags
The final step in our guide about how to make leaf mulch in plastic bags is simple. When the bags are full, just punch some holes into the bags.
You can use scissors, a knife or a screwdriver for this. But be careful not to hurt yourself.
I normally put a few holes all over the bag. This is an important step that you shouldn’t skip. Because without air, the fungi won’t be able to survive, which will slow down or even stop the decomposition process.
In fact, it’s not just fungi that play a part in decomposing the leaves, many other microorganisms are also involved. But fungi nonetheless have a big role to play. (Prakash et al., 2015)
Once you have made sure there are enough holes in the bags, find a convenient spot in your garden and leave the microorganisms to do their thing. Plastic bags are not the nicest to look at, so you might want to consider somewhere out of sight.
There is nothing else to do until spring, when you can start using your homemade leaf mulch.
A Handy Tool To Help You Make Leaf Mulch

As you can see, it’s quite easy to make your own leaf mulch. But those out there who like their tools and who want to make their life easier, let me tell you that there is a handy tool for you.
Or if you have a big garden with lots of leaves, you might want some help. A leaf blower and mulcher is just the thing you are looking for.
This is a very useful tool that doesn’t just pick up the leaves and collect them in a bag, but at the same time shreds them.
My husband got one after we spent a whole afternoon raking leaves into piles and then bagging them up. He hasn’t looked back since. (Neither have I because it has stopped him from moaning about it.)
Like with most tools, you can get cheaper and more expensive options. We got this one:
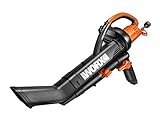
- 3 tools in 1: blower, mulcher and vacuum
- Now designed with a metal impeller providing a more robust machine
- Compact and lightweight
It might not be the best leaf blower and mulcher you can get, but for the price it does a great job.
It’s lightweight enough that you can use it for a few hours without it getting your back. The shoulder strap helps with this, as it distributes the weight across your whole body.
The great thing about this leaf blower is that it’s also a mulcher. This means it shreds the leaves as you hoover them up, ready to be put straight into plastic bags.
One thing I would say is that it’s a very loud tool, but given how big of a help it is, that’s a small disadvantage that doesn’t cause us any problems.
Using this tool saves us a lot of time, because we don’t have to run the lawn mower over the leaves. We also don’t have to rake up the leaves any more, which was really hard work, so we are glad that we invested in this handy tool.
The Best Time To Make Your Own Leaf Mulch
I get quite excited when I see leaves in our garden, because I think of free mulch for our veggies. My husband finds that irritating, because he mostly sees a lot of work.
We start gathering leaves once the first few trees around us have lost all theirs. Depending on what trees you have around, this can be at the start of autumn or more towards the middle.
I wouldn’t recommend waiting until all the surrounding trees are bare, because many leaves might have been blown out of your garden. This means you have lost valuable mulch material.
The best thing is to gather leaves throughout autumn and into winter. This way you get most of the leaves that fall into your garden and doing it more often also means it won’t take as long.
How Long Does It Take For The Mulch To Be Usable?

This is a question that I had when I first looked into making my own leaf mulch. So I thought I’d include this in my guide about how to make leaf mulch in plastic bags.
The good news is that it doesn’t take too long at all, only a few months. The leaves you bagged up in autumn will have partly decomposed ready to be used as leaf mulch in spring and summer.
During that time, the leaves won’t have turned into soil, but then mulch isn’t soil. The mulch will continue to decompose once you have distributed it on your empty beds or around perennial plants.
As the mulch continues to decompose, it will release more nutrients into the soil to feed your plants.
You can leave your leaves in the bags for longer if you want, up to two years. We make leaf mulch in autumn to put on our vegetable beds around March time, ready for planting our plants in May.
But we tend to leave one bag or two for longer to get something that is almost soil. This we then use for our strawberries.
Not Keen On Plastic Bags? – Here’s The Solution
If you are concious of our environment, you might not like plastic and try to avoid it. We try to make greener choices, including in our garden.
And while we have been making our own leaf mulch using plastic bags for years, more recently we didn’t feel that comfortable about it. We first looked for plastic bin bags that were made 100% from recycled plastic.
This was better, but still not ideal. And then I discovered Haxnicks Organic Composting Bags. They are made of jute, so are completely plastic-free.
You use them like plastic bags, as we have described above. But you don’t need to punch holes in them, as they have plenty already.
After you have filled the bags, pop them on your empty, weed-free veggie beds. They will suppress weeds and release nutrients into the soil as the leaves rot. The bags themselves will also decompose, adding yet more nutrients.
Because of the holes, earthworms and other microorganisms can easily enter the bags, helping the leaves to rot down quicker.
They are a fantastic addition for any gardener, and I’m so pleased to have found them. Just a shame I discovered them after we had already gathered up all our leaves. Well, we will be able to use them next year.
How To Use Your Homemade Leaf Mulch
This guide about how to make leaf mulch in plastic bags wouldn’t be complete without telling you how to use your mulch.
Leaf mulch is a great way to return nutrients back into the soil, ready for your new vegetable plants. Layer your leaf mulch in spring onto your beds about 5cm (2in) thick.
Make sure you weed the beds beforehand though, otherwise you are just feeding the weeds.
The leaf mulch will do several things:
- Release nutrients into the soil for your new veggie plants
- Suppress weeds
- Warm up the soil
- Lock in moisture
You can also spread your homemade leaf mulch around existing or emerging plants. This will give them the nutrients they need to grow strong and healthy.
Don’t forget to also mulch any plants in containers, as they need fresh nutrients too.
Now that you know how to make leaf mulch in plastic bags, I bet you can’t wait for the leaves to fall. By the way, there are other natural mulches you can use, which we talk about in our guide. Happy Growing!
Want to know the best time to feed vegetable plants? Head to our guide to find out.


