
Growing from seed is a great way to produce strong, healthy plants for less money. Find out the secret to using a propagator to grow your veggies from seeds.
As vegetable gardeners we use many tools that help us to produce tasty homegrown veggies. One of those is a propagator.
I love growing from seed, because there is so much more choice than when buying plug plants. It’s also cheaper, so good for my bottom line too.
And my propagators, yes I have more than one, are an indispensable tool to get a good crop out of my veggies.
In this article, I will tell you the secret to growing seeds in a propagator successfully.
Benefits Of Using A Propagator

You might wonder if you need to use this handy tool. So let’s discuss why you should use one.
There are a lot of benefits to using a propagator:
- Start sowing earlier
- Provide your vegetable seed with the perfect germination conditions
- Higher germination success rate
- Protect your seedlings from damage and give them the best start possible
- Get healthier and stronger vegetable plants
As you can see, using a propagator can be a great help with growing strong vegetable plants that will produce a good yield.
Imagine a propagator like a tiny greenhouse. It will keep the conditions inside, such as temperature, humidity and light levels, constant, to ensure the seeds have the right environment to germinate.
While it is not necessary to use a propagator, I find that my seeds germinate quicker and my germination rate is higher too.
I also find that by using this handy tool I don’t have to water the seeds as often, because the soil stays moist for much longer.
Now that you know what the advantages are let’s get down to it and find out the secret to being successful when growing from seeds using a propagator.
Growing Seeds In A Propagator In 5 Simple Steps

The good news is, it’s very simple and even if you are new to gardening you can be successful. Follow these simple steps and your veggies will thrive.
Step 1 – Choosing Your Propagator
First you need to decide if you need an unheated or heated propagator. This will depend on what plants you want to grow.
If the seeds you want to grow require a high temperature to germinate, a heated propagator will work better. With an unheated one, you might not generate enough warmth.
While an electric propagator is a great tool, especially the ones with thermostat control, they are also a bit pricy.
In my experience, for the majority of fruit and vegetables that most of us grow, an unheated propagator is enough. Especially if you have a south-facing windowsill.
But it’s up to your needs and what budget you have available.
Step 2 – Sow Seeds And Group Together

Now let’s get to the next step, sowing the actual seeds.
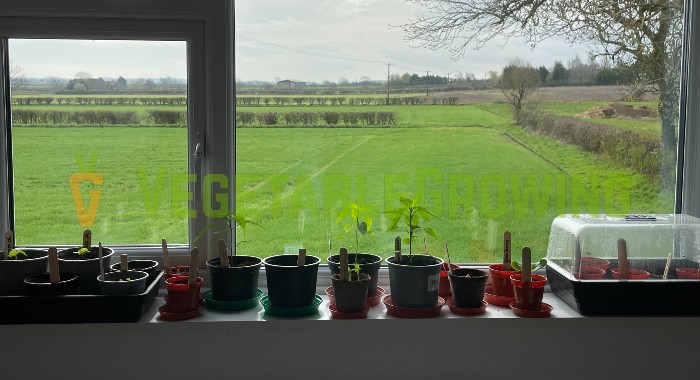
You can use a seed tray or small individual pots. I personally prefer the latter, because it means that if the seeds don’t germinate at the same time, I don’t have to worry about when to take the seed tray out of the propagator.
Fill your container with seed compost and water them.
Top Tip: Watering the pots before you sow the seeds will prevent the seeds from flowing to the edges.
Then sow the seeds. I normally sow two seeds per small pot. Finally, cover with a thin layer of compost. The seed packet will tell you how thin or thick it needs to be.
Now comes an important part: group your containers according to the germination conditions they need.
If you are using seed trays, check before you sow. Use only seeds with similar germination conditions in the same tray.
I have three propagators because this allows me to cater for seeds with different needs. Each propagator will house seeds that need similar conditions.
This method has worked very well for me and the majority of seeds I sow germinate and quickly too.
However, if you don’t have the space or don’t grow enough to justify buying more than one propagator, you can put them all in one. According to researchers from Iowa State University, most seeds germinate best at a soil temperature between 68°F to 86°F (20°C to 30°C).
As long as you’re within this range, your veggie seeds should germinate ok.
Step 3 – Find The Right Spot
The right temperature is one factor, but light levels are also important. Some seeds won’t germinate if they are in direct sunlight, others need as much sun as possible.
Because you have grouped your plants together, you can choose the right spot for each propagator.
I find a sunny windowsill works for the most common vegetables we grow: tomatoes, chillies, cucumbers, courgettes, peas, beans, pumpkins, watermelons, aubergines and peppers.
But check your seed packets to find out what the best spot is for each plant you want to grow.
Step 4 – Create The Perfect Conditions
To grow plants from seed successfully, you have to provide them with the right conditions to germinate. With a propagator this is fairly easy.
Once you have chosen the right spot, you need to take care of ventilation. Any good propagator will have adjustable ventilation panels in the lid.
This allows you to regulate the temperature and air flow. The warmer the seeds need it, the smaller the gaps. It might take a bit of trial and error at first.
I find that if you have a south-facing windowsill, then you need to open the panels fully if the sun is shining. On cloudy days, you can leave the ventilation gaps half open.
Step 5 – Monitor And Get Excited

This is the best bit about growing seeds in a propagator, checking on them every day. It’s the first thing I do after I get up to see if anything has come up.
The soil in the seed tray or pots needs to stay moist, but not be too wet. Not enough moisture will stop the seed from germinating.
In soil that is too wet, seeds can rot. This means they won’t germinate either.
Once a seed has germinated fully, which means both of the first leaves are fully out of the soil, take the pot out of the propagator.
While the seeds might love humid and warm conditions, the seedlings will benefit from fresh air and a less humid environment.
When the first true leaves, that’s the third and fourth leaves that will grow, have appeared, your seedling is ready to be repotted.
Recommended Unheated Propagator
There are a lot of different unheated propagators out there. Some are good, some aren’t. Because you want to buy good quality, but without overspending, I am sharing my recommendation with you.
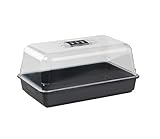
- Propagator 38 cm unheated
- Ideal for use indoors or in warmer weather conditions
- Durable crystal styrene cover provides optimal clarity and maximum light transmission
I use this propagator. I have bought cheaper ones before, but they didn’t last very long.
What I like about this one is that the lid is nice and sturdy. There isn’t much chance of it tearing, like with cheaper ones I had.
The lid doesn’t lose its shape either, which means you can continue to create the right conditions for your seeds.
The ventilation panels on this propagator are also made well. I had a cheaper one where these didn’t work any more after one season, which was a problem.
It’s also available in different sizes, but I find 38cm just right for me. Mainly because I have three, so bigger ones wouldn’t fit on my windowsill.
All in all, this propagator is high quality but at the same time not too expensive. The perfect mini-greenhouse for any type of seeds you might want to grow in your vegetable garden.
Do I Need A Heated Propagator?
Now that you know all about how to grow seeds in a propagator, you might wonder if you need a heated propagator.
Generally, I would say no. Unless you struggle to get the propagator to the right temperature. For example, if you want to grow seeds that need a higher temperature than most seeds.
I find that an unheated propagator is sufficient for the vast majority of veggies, if not all, that we grow in our garden.
If you want to grow your seeds in an unheated greenhouse or polytunnel, then a heated propagator is probably a good idea, especially if you are starting in early spring.
But if you have a sunny windowsill that you are happy to use for growing your veggies from seed, you probably get away without an electric heater.
At the end of the day, it depends on what you want to grow and what conditions your chosen seeds need. The other question is whether you are prepared to spend more money.
How Long Should Seedlings Stay In The Propagator?

One important factor to grow seeds in a propagator successfully is to know when to take the seedlings out of it. The rule I learned and always follow is that you take the seedlings out as soon as they have fully germinated.
This means that the first two leaves have fully emerged from the soil and opened. This can take a few days with some plants.
Pumpkin, courgette and cucumber seedlings tend to be bigger and therefore need a bit longer to fully come out of the soil. Tomatoes, peppers and chillies can emerge fully much quicker. So it is worth checking on your propagator every day.
I find that most seeds germinate overnight and in the morning you can see a green shoot poke through the soil.
It’s important that you don’t leave your seedlings in the propagator for too long as most need good air circulation. In humid conditions fungal diseases are much more likely to occur. And very young seedlings are much more susceptible.
Now that you know all you need to know about growing seeds in a propagator, why not give it a go. I promise it makes growing vegetables from seed so much easier. Happy Growing!


