
Potatoes are a staple in most allotments or veg plots, fresh new potatoes taste delicious straight from the garden with maincrop potatoes providing a good storage crop over the winter months. And the good news is, potato growing is easy!
The main method of planting potatoes hasn’t changed for decades, the simple method of planting potatoes in well prepared ground and hilled up is the most reliable (and easy!) method of growing potatoes.
In this article you’ll learn a few tips that will make planting easier and improve your crop.
If growing space in the garden is an issue, then you may consider growing your potatoes in containers. Container grown potatoes can give huge crops, but do require extra compost and regular watering that isn’t needed in the ground. You can see our “container potato guide” here.
In this article we will tell you all you need to know about growing potatoes sucessfully.
Choosing Your Potatoes

Before you can learn about grwoing potatoes, you need to know a bit more about potato varieties.
When it comes to choosing which potatoes to grow, there are a few things to keep in mind. First, there are three categories of potatoes: first early, second early and maincrop. Their difference lies in when to plant them and how long until they can be harvested.
If you have a small garden or want to grow them in containers, then first earlies are ideal, as they are smaller and they are harvested early for immediate consumption, which means they are less likely to be affected by diseases or pests.
Second early and maincrop can be left in the ground for longer and will grow bigger. And they are grown for storing throughout winter.
Once you have chosen the appropriate category for your garden, you can look at varieties. Different varieties lend themselves to different cooking methods. Broadly speaking, potatoes are either floury or waxy.
Potatoes with waxy flesh hold their shape better, so are ideal for salads or for boiled potatoes. If you love chips or roast potatoes, then floury potatoes are the best choice. To make a success of homegrown potatoes, you should think of what you want to use them for, to choose the right variety for you.
My favourite potato variety for chips is ‘Red Duke of York’, a first early variety. This red skinned potato makes the greatest chips ever, in my opinion.
For salad and boiling, I would recommend ‘Charlotte’, a second early variety. This potato has a great flavour and makes my mum’s potato salad recipe even better.
My favourite potato from maincrop varieties is ‘Sarpo Mira‘. It’s a floury potato which stores very well and provides us with potatoes through winter.
Getting Started Chitting Potatoes
It all starts with getting your seed potatoes. As soon as you buy your potatoes, it’s essential to remove them from their bag, especially if it’s plastic rather than a net bag. Potatoes need to breathe and ideally be separated to prevent any rot of the potatoes that have been stored over winter.
Place the potatoes in a container such as an egg tray that can be used to chit the potatoes
This tray should be kept somewhere with indirect sunlight, frost-free and where no damp will get to them. A window sill is usually a good place. Allowing the seed potatoes to be left in such a manor is called “chitting” and will encourage strong shoots to grow on the potatoes that will ensure a good start when they are planted outdoors.
Chitting has been proven to increase the yields of potatoes. Faster growth and larger crops are the result of good quality seed potatoes and early chitting.
Preparing The Soil
The best spot for potatoes is a sunny patch with fertile, well drained soil. Frost is the arch enemy of young potato plants, so avoid planting them in a location that is prone to late frosts.
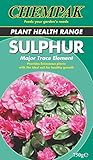
Potatoes do best in slightly acidic soil, so if your soil is more alkaline, you might want to acidify your soil by adding material such as sulphur. If you are not sure what soil pH level you have in your garden, then you get a DIY soil pH test kit to find out.

- Quick, at home results for Soil pH, Nitrogen, Phosphrous and Potash
- Innovative and inexpensive soil test kit features an easy-to-use capsule system and patented color comparators
- Contains all components needed for 40 tests. 10 for each of pH, N, P and K
You can buy Sulphur Pallets, which you can mix with the soil to decrease the pH level.
- Important trace element gives ericaceous plants the ideal soil base for healthy growth
- Will gradually reduce the pH of your soil
While the potatoes are chitting early in the season you can begin the process of preparing the bed for planting. Although you can get a good crop of spuds from almost any soil – prepared or unprepared – the extra effort of digging and adding manure is worth it.
Digging the bed is the first step, removing any large stones and weeds as you go. In years gone by double digging was often done in the autumn for potatoes but risks bringing poor quality subsoil to the surface (as well as being a whole lot of extra work!). Ideally this digging should be done in January when a good strong frost will kill any weed seeds that come to the soils surface.
Potatoes really do well in soil that has had a good layer of rotted manure dug into the soil. A builders bucket full of manure per square metre is plenty to give a HUGE crop of potatoes. If rotted manure isn’t accessible this can be replaced with compost or if necessary pelleted chicken manure.
Finally, it’s also worth remembering that potatoes should be grown as part of a crop rotation and shouldn’t be grown in the same area more than once every three years. Diseases such as potato scab are much more of a problem if correct rotation isn’t adopted.
Planting Potatoes In The Ground
When you buy your seed potatoes, the seller normally provides you with the best time to plant them. Generally, you plant first earlies from late March, second earlies are planted from early to mid-April and maincrops from mid- to late April.
If you want to become a master in potato growing and get ahead, you can plant them two weeks earlier and cover them under horticultural fleece or under cloches to protect the young plants from frost.

- Provide enhanced frost protection for tender plants and shrubs and also protect early potatoes
- Protects down to -5/6ºC
- Also an effective and economical greenhouse insulation without condensation
No products found.
Remove the fleece or cloches a week after the last frost.
Common Planting Method
Let’s talk about the common planting method.
Potato planting time varies depending on the variety chosen; first early potatoes should be planted from early March, second earlies from late March and maincrop varieties from early April. These planting times make sure the soil is warm enough to ensure a good start.
Dig a trench in the growing bed at least 4 inches (10cm) deep. To prepare the trench for planting a sprinkling of blood, fish and bone can be spread in the trench at this point in poor soils and a layer of newspaper can be laid to hold extra moisture.
The seed potatoes can now be placed in the trench with the shoots pointing upwards.
First earlies are best planted 12 inches (30cm) apart with second earlies and maincrop 16 inches (40cm) apart. The rows should always be at least 24 inches (60cm) apart.
Cover the trench over and give the whole area a light watering if no rain is expected within the next 5 days.
Alternative Planting Method
There is another method that you might want to consider. Because you can also grow potatoes under black polythene, where you lay out a black polythene sheet over the soil where you want to plant your potatoes.

- Strong hard wearing 100% recycled polythene sheeting.Repel-pesticidi
- The sheeting is UV treated keeping it lasting longer.
- Multiple uses from in the garden, for DIY projects, in the house, and many other uses. Repel-pesticidi
Prepare the soil as described above, mixing in blood, fish and bone in any case. Because you will find it difficult to feed your plants under the sheet.
Water the ground and then fix the sheet by burying the edges in the soil, to avoid it flying away in the wind. If you live in a windy area, put down some heavy stones as well to keep the sheet in place.
Then cut crosses (about 6 inches or 15 cm long) in the sheet, through which you plant your tubers. Make sure you leave enough space between them as indicated above.
Make some holes in the plastic sheet so that any water can drain away. You don’t want standing water on the plastic sheets, as such puddles are an ideal nesting ground for some insects.
The advantage of this planting method is that you don’t need to earth up your plants. Harvesting is also easier, as you don’t have to dig your potatoes out. Just cut off the stems, roll back the sheet and pick up the potatoes.
Disadvantages of this method are that slugs like the warm soil that the back sheet creates, so your tubers are more likely to be damaged by them. It’s also not environmentally friendly and doesn’t look too nice either.
Potato Aftercare & Harvesting
No guide about potato growing would be complete without a section about aftercare and harvesting.
As the potatoes come up, it’s important to keep covering up the shoots. This is called “earthing up” or hilling the potatoes, which is the main part of growing potatoes.
A mound is created over the growing stems which protects them from frost but stops potatoes from growing near the surface, turning green from sun exposure.
This earthing up process should continue until all frost has passed.
Weeding is important in the first 4-6 weeks of growth to prevent established weeds taking over the potatoes. After six weeks, very little weeding is required.
In dry weather, you need to keep your potato plants well waters, especially once the tubers have started to form. But don’t overwater them, as this could cause the tubers to rot and you will lose your crops.
To increase your yield, feed your potato plants after you have stopped earthing up. I use Envii Seafeed Xtra, which is an organic fertiliser and works brilliantly.

- Boosts Plant Growth & Crop Yields - Natural Seaweed fertiliser that enhances strong & healthy plant growth, promotes lush foliage, and increases crop yields for thriving plants.
- Nutrient Rich Plant Food - Enriched with iron and plant-based amino acids to nourish garden plants, improve soil health, and support plant & root development.
- Versatile & All Purpose - Ideal for lawns, fruits, vegetables, flowers, trees, and all other garden plants. Perfect for any outdoor or indoor plants.
But be careful with nitrogen-rich fertilisers. While nitrogen is a vital nutrient for the growth of potato plants, if they get too much, they will put more energy into growing leaves than tubers, resulting in a lower yield. (Alva, 2008)
So once the plants start flowering, which is when tuber production starts, opt for a hig-potash feed to encourage tuber growth. Feeding potatoes potash at this time will increase the yield. (Khan et al., 2010)
Let’s get to the best thing: harvesting!
Potatoes can be harvested at any size, small new potatoes very early in the season taste delicious but it’s worthwhile later in the season to allow them to grow to their full size for storage. Before harvesting an entire plant you can dig with a trowel or your hand around the surface of the plant which should uncover some potatoes and give you an idea of their size.
Harvesting times are as follows:
- First Earlies – 10 Weeks
- Second Earlies – 13 Weeks
- Maincrop – 18 Weeks
Did you know that you can also grow potatoes for your Christmas dinner? Find out more by reading our Christmas Potato Growing Guide.
Diseases and pests affecting potato plants
While growing potatoes is easy, they can be affected by a variety of diseases and pests. The main disease is blight and the main pest is the slug.
Diseases affecting potatoes
Blight is a fungal disease that affects many plants, and potatoes are no exception. It thrives in warm and humid weather and occurs especially in late summer. In warmer regions, such as the south of the UK it can occur as early as June though.
This is an airborne disease that spreads its spores through the wind, but can also get into the soil and affect the tubers.
The tell-tale signs that your potato plants are affected are dark brown marks on the leaves, which will start to curl and eventually die. As the disease progresses it will spread to the stems and you might find white fungal growth on the underside of the leaves. Eventually, the plant will die.
Blight cannot be cured, so once a plant is affected, it will die. If you want to be an expert in growing spuds, you need to know how to minimise the risk of blight affecting your plants. Here are some things you can do to avoid your plants being affected by blight:
- Practice crop rotation. The blight spores can overwinter in the soil, so it is important that you don’t plant your potatoes in the same spot every year. The recommended rotation cycle for potatoes is four years, so only plant them in the same spot once in four years. The same type of blight that affects potatoes also affects tomatoes, so include them in your crop rotation plan.
- Plant your potatoes in a breezy spot and give the plants enough room to allow for good air circulation. This will ensure that the leaves dry off quickly after rain and thereby decrease the risk of a blight infection.
- When you water your plants, water them from below rather than from above. You want to avoid the foliage to get wet.
- First earlies varieties are more likely to avoid being struck by blight, as they are harvested before the disease is most active. You can find out when blight is most active with the help of BlightSpy, a website that monitors blight and can even send you alerts when blight is coming to your area.
- If you notice any signs of blight, remove the affected leaves immediately, this can slow down the progress of the disease, but won’t stop it. Once the stems become affected, cut off the foliage at the stem close to the soil and remove and plant debris. Make sure you destroy the affected plant material, for example by burning. Do not compost it. Leave the tubers in the soil for about two weeks until the skin has hardened, then harvest. Use tubers from blight infected plants as soon as possible and avoid storing them.
- If you use your potatoes as seed potatoes, do not use any seed potatoes of plants that showed signs of blight, as they might be infected and grow an infected plant.
- You can also buy blight resistant varieties. However, the genetic make-up of the blight fungus changes constantly, which means varieties that were classed as blight resistant might not be resistant anymore. You can find out which potatoes have resistance to blight on the British Potato Variety Database.
Another type of disease you might have to deal with when growing potatoes is potato scab. There are different types which can be fungal or bacterial diseases. The main two types that affect potatoes are common scab, which also affects other root vegetables, and powdery scab.

You can only see signs of an infection on the tubers themselves, so only when you come to harvest your potatoes will you know that they have been infected by scabs.
Common scab shows rough, scabby patches on the skin, while powdery scab manifests itself as irregular brown raised areas or dents.
Common scab occurs in dry soil when the tubers form, while powdery scab thrives in wet soil. So it is important to keep your potatoes well watered, while not over watering and drenching the soil. If you grow your potatoes in containers, make sure they have enough drainage holes.
Although potato tubers infected by scabs don’t look very nice, they are still edible, just peel or cut away any scabby bits.
Scabs can’t be treated, but there are things you can do to minimise the risk of the disease affecting your potatoes:
- If you use your own potatoes as seed potatoes, don’t select any from potatoes that had a scab infection.
- Keep your potatoes watered in dry weather, especially in the time when the tubers are forming. You can add organic matter to the soil, which will help with water retention as well as adding nutrients for the plants. But don’t water the plants in wet weather as this can create favourable conditions for powdery scab.
- The common scab is more likely to occur in alkaline soil, so if your DYI Soil pH test has shown your soil is alkaline, look into options to acidify your soil, such as sulphur pallets.
- There are some varieties that have shown resistance to scabs, such as ‘Kind Edward’. To find up-to date information about resistant varieties, visit the British Potato Variety Database.
Potato black leg is another disease you need to be aware of if you want to be a master of potato growing. It is a bacterial disease that can affect potatoes and which can be active as early as June. An infected plant will have stunted stems and pale green or yellow leaves, which curl up or inwards. The stems close to the soil will be brown or black. The tubers in the ground will have rotten flesh.
There is no cure for potato black leg, so once your plant is infected, remove and destroy it, don’t compost. And also make sure to remove and destroy any tubers still in the soil.
Potato black leg infections normally start in the seed potato, so make sure you buy your seed potatoes from a reliable seller. And there are some other things you can do to minimise the risk of this disease affecting your potatoes:
- If you save your own seed potatoes, never save any from an infected plant. And store healthy ones in dry conditions to minimise the chance of bacteria growth.
- If you use containers, make sure they have drainage holes to allow excess water to drain away, because this disease thrives in warm, damp conditions.
- Harvest your potatoes in dry weather.
- If you spot any signs of a potato black leg infection, remove the infected plant and destroy it, do not compost it. Make sure you remove all the potatoes from the soil as well and destroy them too. Even if the tubers look alright, they will have the bacteria in them.
- Practice crop rotation, only plant potatoes in the same spot once every 3-4 years to avoid a build up of the bacteria in the soil. If you grow in containers, don’t reuse the soil for for potatoes.
- There are varieties that show some resistance, such as Charlotte or Pixie. But be aware that bacteria change genetically all the time, so these might not be resistant for years to come. To find out what varieties are resistant to which pest or disease you can check the British Potato Variety Database.
Pests affecting potatoes

Let’s move on to pests that you might encounter that will nibble at your potato plants.
Potato eelworms are wormlike animals, also called nematodes, that feed on the roots of potatoes. By doing so they take out nutrients from the plant which can damage the plant’s health and crops.
Poor growth and chlorosis (yellowing and wilting leaves due to the lack of chlorophyll) are signs of an eelworm infestation. To be sure, lift the plant out carefully and if an infestation is present you should see tiny round objects clinging to the roots.
These are the bodies of dead females and they carry hundreds of eggs and can be white, yellow or chestnut brown. Use a magnifying glass if you are not sure.
A heavy infestation can kill the plants and cause the tubers to rot, and it isn’t much fun when a pest destroys all your hard work. To minimise the risk of eelworms destroying your hard work, follow these steps:
- I know I am repeating myself, but practice crop rotation. This will keep the numbers of eelworm down and which will minimise the effect on your plants and crop. If you grow in containers, don’t reuse the soil for growing plants.
- Harvest your tubers as soon as they are ready.
- After harvesting, make sure you get rid of all potatoes in the soil because the eggs can survive in the tubers. The eggs can survive in the soil for up to 10 years, so turn over your soil to expose them for predators to eat. If you are growing in containers, destroy the soil from infected plants, don’t compost it.
- Varieties such as Maris Piper are thought to have some resistance to eelworms. To be sure, check the British Potato Varieties Database.
Cutworms are the caterpillars of some moth species that feed on tubers in summer. They are greyish-brown, pale green or creamy-white. You will find them in the top few centimetres of soil, where they can cause damage to developing plants, roots, and tubers.
If your plant shows sudden signs of wilting, you might find cutworms in the soil of the affected plant. You can take these steps to minimise the risk of cutworms destroying your crop:
- Remove any caterpillars you see and place them in an area of your garden where they cannot do any harm.
- Encourage its natural predators into your garden, such as birds, ladybirds, wasps and the ground beetle.
- Adult moths like to lay their eggs in areas where there is dense vegetation cover. They also like areas that have been dug up, for example, to make a vegetable plot.
- Cultivate your soil in autumn after harvesting to expose the cutworms and other insects to predators.
- Keep your soil well watered, as young cutworms are vulnerable to rain or irrigation.
- Keep on top of your weeding, as cutworms might use weeds as alternative hosts to survive.
- You can also cover your potato plants with netting to prevent the moths from laying their eggs on your plants.
I would recommend this garden netting as it works well to keep pests away.
No products found.
Wireworms are the larvae of the click beetle, which feed on roots. Only three species are known to damage garden plants, though.
They are thin yellow-brown larvae with three pairs of small legs on the head end. You won’t see any signs of them above ground, but they tunnel into potatoes, leaving holes with black edges.
Affected potatoes can still be eaten, just cut off the affected parts.
Wireworms occur most likely in areas which have been turned from grass to vegetable bed. A small number of wireworms won’t impact your crops, but there are some things you can do to minimise the risk:
- Soil cultivation after harvest will help to reduce the number of wireworms in the soil. Turn over the soil to expose the larvae to predators. Beds that have been converted from grassy areas should become pest-free within two years of cultivation, as adult click beetles prefer to lay their eggs in grassy areas.
- By encouraging natural predators, you can also reduce their number. Natural predators to wireworms are birds, wasps, hedgehogs, and ground beetles.
- If you spot any larvae, remove them from the soil and place them in an area where they can’t do any harm.
- The most foolproof way to avoid wireworms eating into your potatoes is by growing them in containers.
Slugs are a common problem in vegetable gardens, and they like most plants, so whatever you grow, slugs might cause you problem. Unfortunately, some slugs love potatoes, so to make potato growing a joy, you need to know how to defend them from slugs.

They usually start eating tubers in August into autumn. They tunnel their way into the potatoes to eat the flesh. A heavy slug infestation can hollow out whole potatoes.
There is not much you can do to keep slugs out of your garden, but you can take some steps to minimise the risk to your potatoes:
- Harvest your potatoes before August before the slugs become a problem for your tubers
- Lift maincrop potatoes as soon as they have matured if you have a slug problem
- Cultivate the soil after harvest to expose the slugs to their predators
- Grow your potatoes in containers, where slugs are unlikely to be a problem for the tubers
We hope you found this article about potato growing useful and wish you a plentiful harvest!


