If you like the taste of freshly harvested peas, but don’t have a big garden, then why not try growing peas in pots? It’s easy-peasy!
Peas aren’t just deliscious, but also very healthy. They’re a source of protein and fibre, as well vital minerals and vitamins. (Wu et al., 2023) So adding them to your diet will be beneficial.
And because you can grow them in pots, you can benefit from these nutrients, even if you only have a small garden.
In this article, you will discover step by step how to grow your own peas from seed in pots, including how to sow peas, how to care for them, and exactly how to support them.
Best types Of Peas To Grow In Pots
Before you begin, you must first choose which to grow. And there is a lot to choose.
Like with potatoes, peas also come in first earlies, second earlies and maincrop varieties. First earlies will be ready in around 12 weeks, and the second earlies in 14 weeks. Maincrop peas will take longer.
Most gardeners will grow both early and maincrop varieties to have a longer harvesting period.
Then, there are three different types of peas:
- Garden peas: these are the ones most of us ate as children. The pods are inedible, so if you grow these there is some work involved after harvesting.
- Mangetout: the pods are flatter and can be eaten. They have a sweet taste, hence the name. They should be harvested when they are still young.
- Sugar snap peas: like mangetout, they have edible pods. The difference is that sugar snap peas are harvested when they are more mature and rounder.
My personal favourite are sugar snap peas, because I think they just tate the best.
Dwarf Vs Tall Peas
Tall peas can be very difficult to provide support for, with some varieties growing to 8-10 feet tall, but that is made up for by the huge crops they provide and the incredible taste many of the tall heritage pea varieties have.
If you are growing pea pants in pots, the tall pea varieties will work, but the pots are more likely to fall over in the wind, which can damage the plants.
Dwarf peas have become more popular in recent times as they are easier to harvest by machine. This means that most of the new varieties in the catalogues are now dwarfs. Dwarf beans are easy to support (many new varieties need no support at all), quite productive, and are often earlier in the season.
We would recommend dwarf varieties for growing peas in containers, as these will be more suitable.
To make the choice easier for you, we have put together a list of varieties of peas that are ideal for growing in pots.
Kelvedon Wonder: this garden pea is a dwarf variety that can be grown as an early and maincrop. This will give you fresh peas into autumn. It’s a great pea variety to grow in pots.
Proval: this early pea variety only grows 60cm tall, do ideal for growing in pots. What I love about it is that it can endure harsh weather conditons and will crop from April to October.
Half Pint: this garden pea variety is the perfect option if you only have a patio or balcony. With a maxium hight around 25cm, it’s a tiny plant, but it will give you regular sized pea pods.
Shiraz: this mangetout pea is the first purple pea you can get. The flowers are stunning too.
Now that we have looked at the best varieties for pots, let’s get down to the nitty-gritty of growing your pea plants in pots in the UK.
Planting Pea Seeds

Start your peas off indoors in February, as this will give you a head start and also keep your pea seeds safe from pests.
If you have lots of room, you can start them off in their final pot. However, most of us will have less space, so start them off in trays on a windowsill, but not in direct sunlight.
Peas sown indoors should be sown in a multipurpose compost about 2 inches (5cm) deep. Water well straight after planting, but be sure not to overwater after planting as this can cause the seeds to rot. Within a week, you should expect the first peas to be showing their heads.
Once your seedlings have reached a height of about 2-3 inches (5 – 7.5cm) you can plant them on.
When you grow peas in pots, you need a big pot or container, at least 12 inches (31cm), that has drainage holes. This is important, because otherwise the pot might get waterlogged and the roots will rot. Peas grow shallow roots, so you don’t need a pot that is too deep.
Once you have chosen your container, put a layer of stones in the bottom and then cover with peat-free compost mixed with well-rotted manure. Fill the container almost full, then sow 3-5 seeds in a circle, depending on how bushy the varieties of peas you want to grow.
Give them a good soak!
Supporting Pea Plants
When it comes to supporting peas, the best method I have found in over 20 years is using chicken wire stretched between two strong posts. Dwarf peas will grow up to four feet (up to 120cm) netting, with taller peas using two rows of netting making a height of 8ft (240cm).
That’s the easiest way to create your own pea trellis. It might not look as nice as one you can buy, but it’s cheap, simple and does the job. Just put your pots in front of the netting.
When you grow peas in pots, it’s important that the posts are placed at least every 4ft (120cm) to give enough support as the peas grow. String can also be used to support peas that come loose from the wire.
The second method I have used successfully for dwarf peas is to place small posts every 3 feet (90cm) on each side of a row of peas. Stretching string between these posts supports the peas and keeps the crop off the ground. This is a good method for dwarf peas as it is so easy (and free!) but it doesn’t quite provide the same amount of support as chicken wire.
If you’re not sure of making your own, you can buy a bean and pea trellis that will be ideal for the job.
Aftercare & Harvesting For Peas
When your pea plants are in their final pots, you need to find the right spot for them. They don’t need a sunny spot, as they grow well in cooler temperatures. So partial shade works well for them.
Especially in the height of summer, you want to make sure they aren’t in full sunshine in the afternoon. The beauty of growing peas in pots is that you can move them around easily to meet their needs.
Keep them out of strong wind, as the plastic containers or pots might fall over, especially if you are growing a taller variety. However, light wind won’t do them harm; on the contrary, it can improve air circulation.
When growing peas in containers, you need to make sure you water them regularly. You need to keep their soil moist, but don’t overwater them, as this could cause root rot, which will decrease your yield. Good drainage is key!
If you are not sure if you should water your peas or not, check the topsoil; if it’s dry, give them water. Moist soil is the key to healthy pea plants.
Once your pea plants are a good 4 inches (10cm) tall, you can begin feeding with a liquid seaweed fertiliser to give the plants an extra boost.

- Boosts Plant Growth & Crop Yields - Natural Seaweed fertiliser that enhances strong & healthy plant growth, promotes lush foliage, and increases crop yields for thriving plants.
- Nutrient Rich Plant Food - Enriched with iron and plant-based amino acids to nourish garden plants, improve soil health, and support plant & root development.
- Versatile & All Purpose - Ideal for lawns, fruits, vegetables, flowers, trees, and all other garden plants. Perfect for any outdoor or indoor plants.
Or if you have a womery (and I think you should), use the liquid fertiliser you get from that, it’s pure liquid gold for any gardener, as it doesn’t just contain a whole host of nuturients but also probiotics that will keep your plants strong and healthy. (Yatoo et al., 2021)
Alternatively, you can make your own liquid fertiliser from nettles, weeds, kitchen scraps, etc. It’s free and a great source of vital nutrients.
This feeding should be done once every two weeks until the first flowers begin to show. Stop feeding once the first flowers form, and the plant will begin to put its energy into the peas.
For the early, quick-producing varieties, it can be as early as 10 weeks before harvesting begins.
Maincrop varieties take longer, with harvesting beginning after 15 weeks.
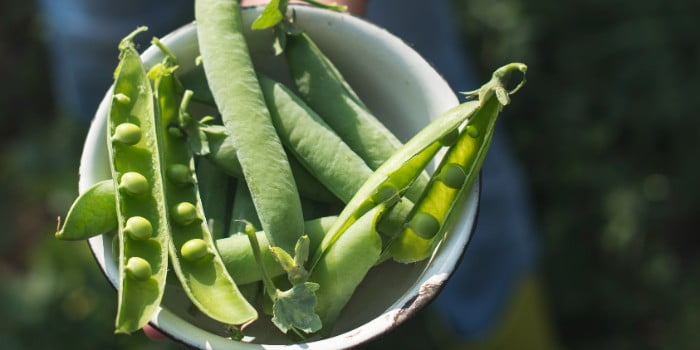
Mangetout varieties can be harvested as soon as you can see that peas are forming. Sugar snaps and garden peas are ready for harvest once their pods have swollen up.
Make sure you pick your peas regularly to ensure that the plant keeps producing them. When you harvest your peas, start from the bottom of the plants, as that’s where the most mature fruits will be.
Use both hands to pick the peas to make sure you don’t cause any damage to the plant.
After the season has ended and the plants have finished, it’s a good idea not to pull the roots from the soil. Peas are a nitrogen-fixing plant (Herridge and Rose, 2000), and leaving the roots in the soil to decay will add nitrogen that is valuable for the next crop to be planted. The foliage can be composted as usual.
When growing in pots, you do the same and use the compost again next year for a different crop.
When done right, growing pea plants in pots can give you a huge crop, so you better start thinking about how you want to eat them. I love to make pea and bacon pasties.
Pests And Diseases That Can Affect Peas
No guide on growing peas in containers would be complete without a section on pests and diseases.
Pests
Growing peas in containers can help to protect them from some pests, but there are still some you should keep an eye out for.
The pea moth is the main pest that might attack your pea plants. The female pea moth lays her eggs on flowering peas. Their caterpillar will then get into the pods and eat the peas.
You won’t know that this has happened until you open your pods, so it’s best to prevent the pea moth from even getting a chance to lay eggs on your peas.
Early or late peas (which are sown in March or June) will flower outside the period when the female moths will lay their eggs. So, this is one way to prevent this pest causing problems.
But if you want to have fresh peas from the garden all summer, the best way to keep these moths off your plants is by using insect-proof netting. This mesh works well, not just for peas.
No products found.
Wood pigeons are another animal that likes peas, and they can strip a plant of all its leaves in no time. They are also a threat to brassicas like broccoli.
To prevent pigeons from destroying your plants, bird netting can be used. The insect mesh will also help, so there is no need to buy two types of netting.
Also, once the plants are well established, they should be able to tolerate any attacks from pigeons.
A pest that can do great damage to your seedlings is the pea leaf weevil, a small green beetle. Adult plants can tolerate these insects, but seedlings are too small and weak to withstand an attack.
If you are starting your peas indoors, it is unlikely that these beetles will do much damage. But if you sow your seeds straight in the big pots outside, then you might want to cover them with insect mesh, like the one mentioned above.
Aphids are a common garden pest, and they also like peas. While most plants can tolerate a small number of aphids, a heavy infestation can destroy your plants.
You will know that you have an aphid infestation because you will be able to see the tiny green insects all over your plant. Aphids suck nutrients from the stems and then secrete a sugary liquid, called honeydew. Ants love honeydew and will farm aphids to get it.
So if you also have ants around your plants, that’s bad news. The good news is, you can do to prevent these little pests from ruining your crops:
- You can pick off aphids by hand and destroy them, but that is only viable if there are only a few
- If your plants are strong, you can put some newspaper underneath the plant and carefully shake it. The aphids will fall off and drop on the newspaper. Place them in a spot in the garden where they can’t do harm or destroy them.
- Encourage natural aphid predators into your garden, such as ladybirds, hoverflies, and lacewing. You can do this by planting thyme, yarrow, dill, marigold, etc.
- Some plants also repel aphids, so planting these close to your peas will help keep them aphid-free, such as coriander, marigold, mint, basil. You can find out more about using companion planting to keep pests away in our guide on companion planting.
- You can also use insecticidal soap to wash off the aphids. I have used this before and it worked well.
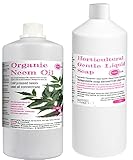
- Pure organic cold pressed neem oil concentrate unrefined one 1000ml bottle
- Gentle biodegradable liquid soap derived from plant oils one 1000ml bottle
- Combine together with water to form a neem spray or drench
Knowing how to deal with aphids is important for any gardener, not just for growing legumes like peas in pots.
Diseases
While growing pea plants in pots in the UK is easy, there are some diseases you should know about.
Powdery mildew is one of the most common diseases. It’s a fungal disease and can be easily spotted by the white or light grey coating on the leaves.
This is a disease that will affect plants that are stressed, so it is important to ensure your peas are healthy. Here are some things to do to prevent powdery mildew becoming a problem:
- Water your peas regularly, as lack of water can stress a plant
- Like any other fungus, mildew thrives in damp conditions, so make sure that you give your peas space to ensure good air circulation.
- Fungi will form on dead plant debris, so clear away any dead plant material in the pot
- Some varieties of peas are resistant to mildew, so growing these will lower the chances of it getting a problem
- If you spot any signs of the disease, remove the infected leaf or stem and destroy it, but don’t compost
Frequently Asked Questions?
Do you still have questions about growing peas in pots? You might find the answer in our FAQ section.
Do I Need To Soak The Pea Seeds Before Sowing?

The short answer is no, you don’t have to. But let’s look at this question in more detail.
What happens when a seed gets planted in soil? The seeds, which are dry, will slowly take on water from their surroundings, which will start the germination process.
Without water, seeds can’t germinate.
The reason the seeds are dry is so that they can hibernate until they have the right conditions to germinate. A lot of seeds are in fruit that gets eaten by animals. In the stomach, they rehydrate, so when they are excreted, they are ready to hit the soil and germinate.
Soaking the seeds in water mimics this process in the stomach and, as a result, the seeds will germinate quicker.
If you are in a hurry and you want your pea seeds to germinate quicker, then go ahead and soak them. Normally, 24 hours or overnight is sufficient.
Just put them in a shallow dish and cover with tap water. Over-soaking could kill the seed, so don’t soak them any longer than 48 hours.
Can Peas Grow In Small Pots?
Yes, you can, is the short answer. But you should consider the following points.
You would normally grow several pea plants in one big pot, so they have each other for support (and I mean in terms of climbing rather than psychological support) as well as any support you provide.
If you have a smaller pot, you can grow fewer plants in the same pot. But because the pea roots are shallow, you can get away with a smaller pot, as long as you are happy to grow fewer plants.
Peas can grow quite tall, depending on the variety of peas, and a smaller pot will be less stable. If the container falls over, it could damage the plant.
A smaller pot also means less room for the roots, even if they are shallow. And that means that the plant won’t grow as big and the yield will be less.
Smaller pots will also dry out quicker, so you have to keep on top of the watering.
So, if you consider all these things, you could give it a go.
Now that we have shown you how easy it is growing peas in pots, why don’t you try it out in spring? Freshly picked peas are absolutely yummy, and they are also good for you. It’s a win-win situation.


